To build an artist website can be a time consuming task, especially if you are planning to use a self-hosted solution like WordPress. This article explains the steps for building and maintaining an artist website using WordPress, with emphasis on the key elements that should be included in order to ensure a successful online presence in the future.
When it comes to building your artist website, there are a lot of steps that go into the process. I’ve been through this process several times and have some good tips for others who are just getting started.
1. Decide on a website host
The first step to build an artist website is deciding on a website host. Hosting is place where website lives. What kind of hosting you need depends on your needs. Shared hosting is good for beginners and small businesses, VPS and dedicated hosting are best for larger websites.
You should know what you want from your website before you start building it. Do you need a simple blog or something more complex? Do you want to sell products with your site or only art? Is it going to be mostly static, ecommerce or somewhere in between?
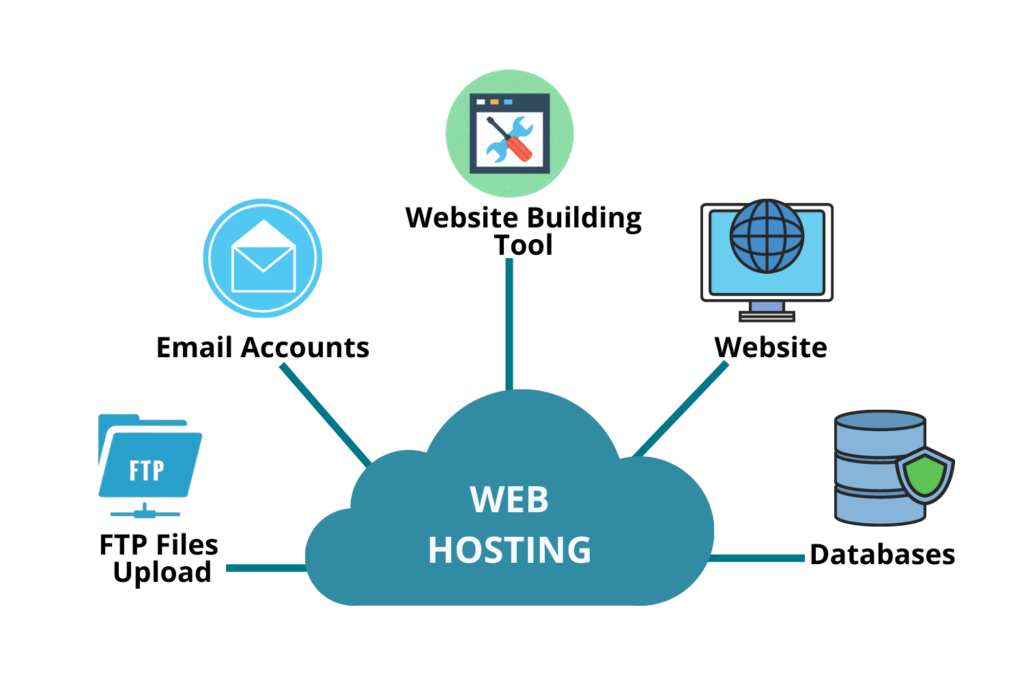
Shared hosting comes with many different features that might not be necessary for your business. For example, many shared hosts provide email accounts for all of their customers. If you don’t want this feature on your account, then you should contact your host and see if they offer something else instead.
Another important feature to look for in shared hosting is whether or not it supports cPanel and a web control panel.
CPanel is an interface that allows users to manage their websites from one central location, rather than having to log into each individual account separately. The web control panel allows users to easily update and manage their sites through a graphical interface rather than having to use text-based commands like cPanel can provide.
Check out the best hosting services here and choose which ones best suit your needs.
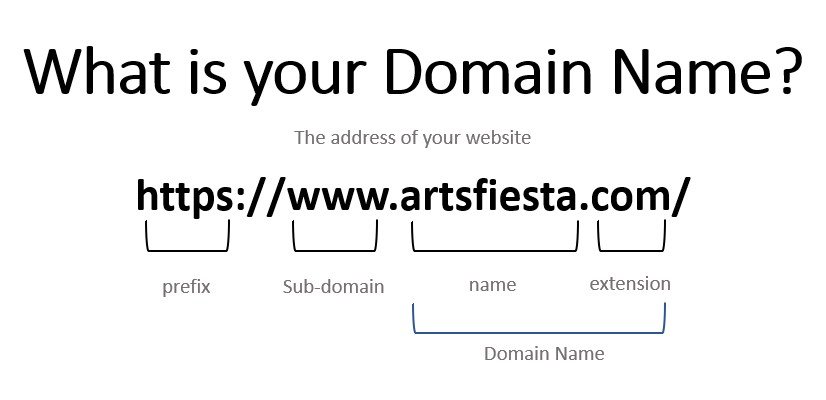
2. Register your domain name
Choose a domain name. A domain name is what humans see when they visit your site. It’s also the URL (topic-based label, for example my site domain name is www.artsfiesta.com, where artsfiesta.com is my sites domain name) that appears in search engines like Google, Bing and Yahoo!
Buy a domain name registration and web hosting package from a reputable company, as mentioned above, that offers both services together in the one package deal with no hidden fees or additional costs (like setup fees).
Your hosting provider will help you set up your new site and transfer any existing content to it over the course of several days or weeks while they install everything on the server for you.
Create a user account with your web host. The user account gives you access to the files on your server and gives other users permission to log in and access your site through their own networked computers using the same login information they used to access it through the web host’s interface.
Install an FTP client software on your computer so that you can upload and download files from the web host’s control panel without having to log in each time.
3. Get your hands on WordPress
WordPress is actually built for non-technical people. The user interface is intuitive and friendly.
Install WordPress on your new site using their step-by-step guide. Once installed, you’ll be able to access your dashboard (admin area). Explore the basic settings in the admin view.
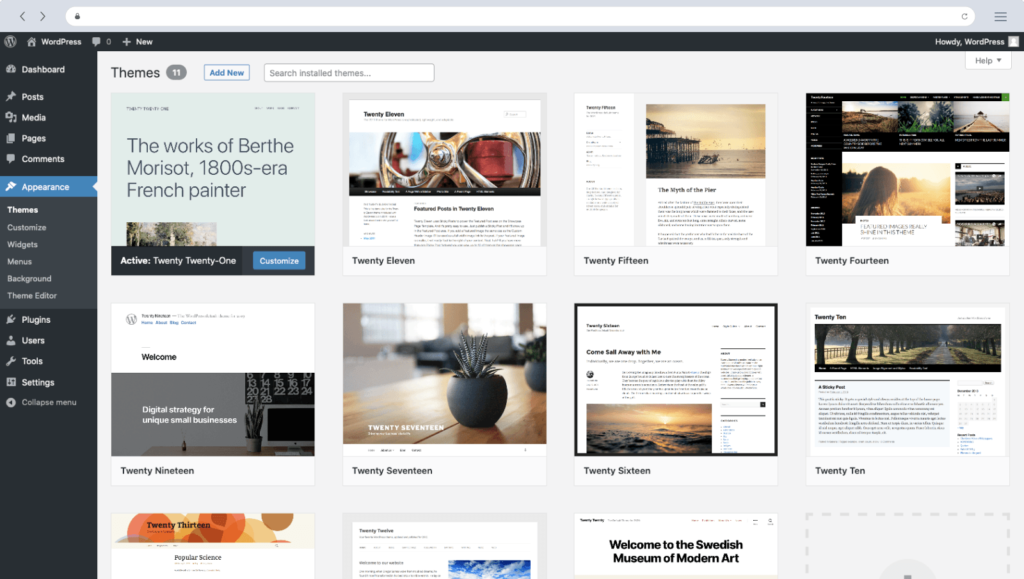
Install a theme from the theme repository or download it from the Theme Directory if you don’t want to use an existing theme.
Check out the important plugins to install that will make your sight more delightful and easy to use.
4. Add pages and make future tweaks
1. Add a blog, contact page, email list, social media accounts, and ecommerce store (if you want).
2. Write a bio page of yourself as an artist. This should be the first thing anyone sees when they land on your website. Explain your journey towards becoming passionate about your art.
3. Add a portfolio section to showcase your work and art. You can either upload images using beautiful gallery or display sections available in wordpress blocks.
4. If you want to sell merchandise, install woocommerce plugin and add a shop section to sell your original paintings or prints of your work or other products such as stickers and T-shirts etc.
5. If you make it an ecommerce store, add login page, privacy policy, terms and conditions and FAQ page.
5. If you have any online courses or workshops that people can enroll in, add those sections too!
6. If you have any videos, explain how they will benefit visitors by explaining what they are about and how long each video is going to be so that visitors can decide if it’s something they’re interested in watching before clicking through.
7. An artist website should have a newsletter form to collect emails of the people visiting your site for better reach.
5. Launch it 🚀
Your website should be designed specifically for artists, with an emphasis on their art and their business. It should be clear that you are an artist, not just a web designer or developer.
This can seem an arduous process, but it is doable! Once you have established your identity as an artist and built up some credibility online, it will be easier to attract new clients and turn them into customers.
This post includes 5 steps on how to build a simple artist website. It must be stressed that there is no need to make really complicated or bloated website, it’s better to start with something simple and progressively add new features and functionality as your site grows.
For inspiration check out my artist website artsfiesta.com to get some ideas!