The majority of us began drawing when we were kids. Basic art tools for drawing and painting were not that significant to us back then. On some notebook paper, a regular pencil would frequently “do the thing.”
The materials and tools we picked, however, were more significant as we matured and developed as artists. Along the way, it becomes clear that high-quality supplies for artists translate into high-quality work, thus it makes sense that aspiring artists would want to work with the greatest supplies available.
You’ll quickly discover as an artist that you desire to experiment with new methods and materials. Despite several technical developments, the supplies used by painters have not changed significantly over time. Although there is a broader variety of pigments available now and most materials are easier to handle, the fundamental method of using them is substantially identical.
Here are some basic art tools used for drawing and painting and you can buy these at any art online store.
Pencils
History states that Germany is where pencils originated, as the country mass-produced the first pencils ever in 1662.
Faber-Castell and Steadtler established a vibrant worldwide pencil industry that grew throughout the 19th-century Industrial Revolution.
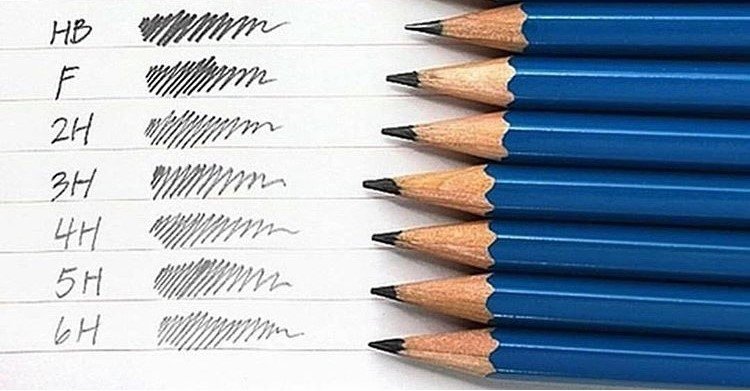
The pencil industry has found and sorted numerous varieties of pencils into different categories based on their level of difficulty to work with and their ability to generate black color.
The main categories of pencils that people still use in modern times are as follows.
1. B Pencil Types
These pencils produce darker lines than “H” and “F,” yet you can quickly erase them with no effort. They are great for doodling and drawing as well, while other individuals could use them for taking notes.
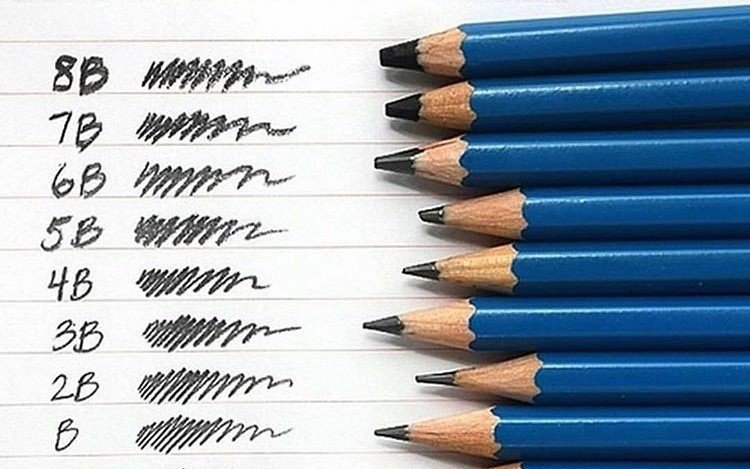
Because ‘B’ pencils are softer and so leave more graphite on the paper, this is what gives them their black colour.
- 8B
This type of pencil is extremely dark and comes out as the darkest of grays on paper. Experts recommend using it for drawing and sketching purposes because it creates very dark and prominent marks that stand out on a page.
- 7B
Almost similar to 8B, this type of pencil is also great for art-related purposes. It gives off a very dark gray shade that sticks to the paper and makes drawings look great on paper.
- 6B
This pencil suits best for those who like to draw, and it has a specific design to add dark values to your drawing pieces. This is also a great option for creating portraits where you would want to achieve realistic textures like skin, fur or fabric.
- 5B
This pencil produces a darker mark than the ones after it and is quite softer than a 2B pencil for example. This is because the higher number of B that a pencil is, the softer the pencil will be.
- 4B
The 4B pencil is slightly lighter than the ones before it and is also an excellent choice for sketching and drawing purposes. Anyone with an aptitude for art and drawing will definitely enjoy using this pencil.
- 3B
This pencil is more like a mix of dark and light but is more towards a lighter gray. It is an ideal option for those who like their drawings to contain light values with slight shades of dark gray.
- 2B
The 2B pencil is best for medium to dark shading and provides a good range of tone or value from light to a dark shade. The content is commonly used for art purposes, especially drawing, shading, and sketching.
2. H Pencil Types
The letter “H” here stands for the pencil’s hardness. This means that a pencil’s lead will be tougher the higher the value of H it has. Additionally, the pencil will be lighter the firmer the lead is.
Because they can keep a tip in place and are typically very hard, “H” pencils guarantee incredibly precise writing. One may easily use these pencils to create objects or write things on paper because they also produce fine lines that can be readily erased.
- 2H
This pencil type is great for any technical work that involves making lines that are easily erasable. This is particularly because 2H contains a very light amount of lead. It is also a great option for those who just begun to draw and wish to add very light shades to their drawing.
- 3H
3H is an extremely light shade of gray that leaves a very light imprint on paper. It can be a great choice for sketches where you need to add light shades or slightly fill in the empty spaces with a pencil.
- 4H
This is an excellent choice of pencil for light, fine and even shading. It is more towards the gray side and less shiny because of is also easier to keep sharp so one can easily use it for shading and sketching. The amount of clay it contains.
- 5H
This type of pencil helps create the darkest and the thinnest of lines, given its hardness levels. This happens because it falls towards the end of the “H” or hardness scale, hence, giving a hard touch. It is a great option particularly for those who are into drawing and sketching and wish to draw dark and think lines.
- 6H
This top-quality graphite pencil is primarily designed for sketching, writing, and drawing. It is an ideal pencil for artistic and technical applications.
Keeping in mind the hardness rule, it gives maximum hardness with the darkest and thinnest look on paper.
3. HB
This pencil falls in the exact middle of the pencil lead scale. HB is a significantly hard pencil, making it a reasonably hard pencil even for drawing purposes.
The pencil’s hardness is denoted by the letter ‘H,’ and its blackness is indicated by the letter ‘B.’
4. F
‘F’ stands for fine point. This pencil, compared to the others is slightly harder. While it is certainly easier than a few to keep sharp, it is way too dark for general and everyday drawing.
Painting Brush
When it comes to art, there is nothing that compares to the thrill of selecting brand-new brushes and witnessing the colours meld to create your most recent piece. Your paint brushes are unquestionably the unsung heroes of this entire process, therefore it is only fair to give them the credit they merit. It goes without saying that without the use of the proper paintbrush, no work of art would actually appear fantastic. You can find the ideal brush to ensure that all of the strokes, no matter how big or small, turn out just how you want them to.
It takes knowledge and expertise to select the appropriate paintbrushes from the several types available dependent on your medium and paints.
Beginners and experts in painting should have the following basic art tools on hand:
- Brushes of various sizes and types
- Palette and palette knife
- Paint in primary colors and white
- Canvas
1. Mop Brush
When working with large areas, especially watercolors, this type of brush is commonly used. This brush is frequently used for “mopping” techniques such as washes. Featuring soft bristles that form a round or oval shape, a mop brush is thick.
Other techniques you can use mop brushes for are blending paints, mixing oil paints and acrylics. You can also add minute details with lighter or darker shades with the brushes. To maintain the condition of your mop brush, make sure you keep it clean at all times. Also allow the bristles to dry properly before storing as over soaking can cause the bristles to lose smoothness.

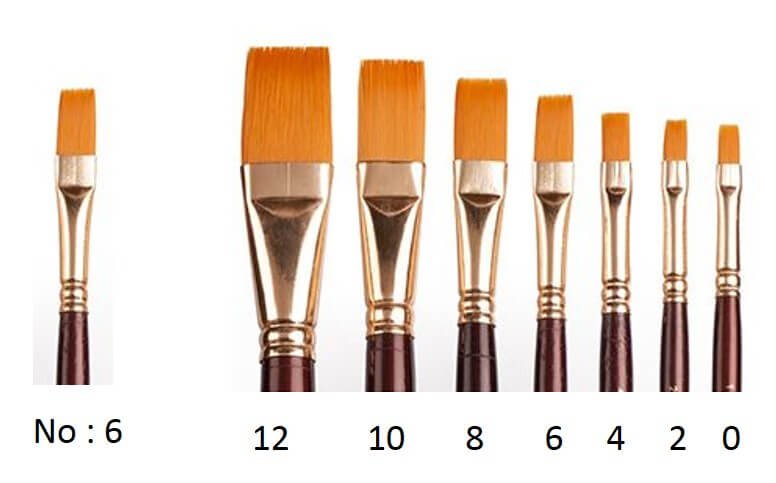
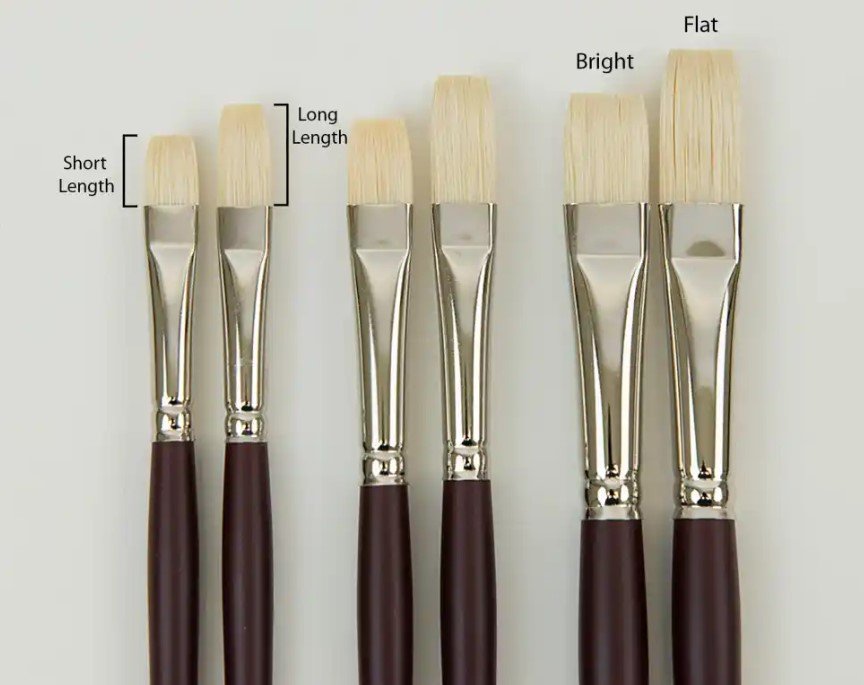
2. Flat Brush
An artist may find flat brushes, which are another popular alternative, in their toolkit. These brushes are of the narrow variety and have thin bristles. In a wide pattern, they are often organized to lie flat. When compared to other brush types, which often have a rounder edge, flat brushes stand out for having a characteristic, sharp edge.
You can use flat brushes for many different purposes including washes of different opacities, blending of colours, sharpening of edges, borders of paintings and many more. As these brushes are available in short as well as long bristle lengths, they are extremely versatile and helpful.
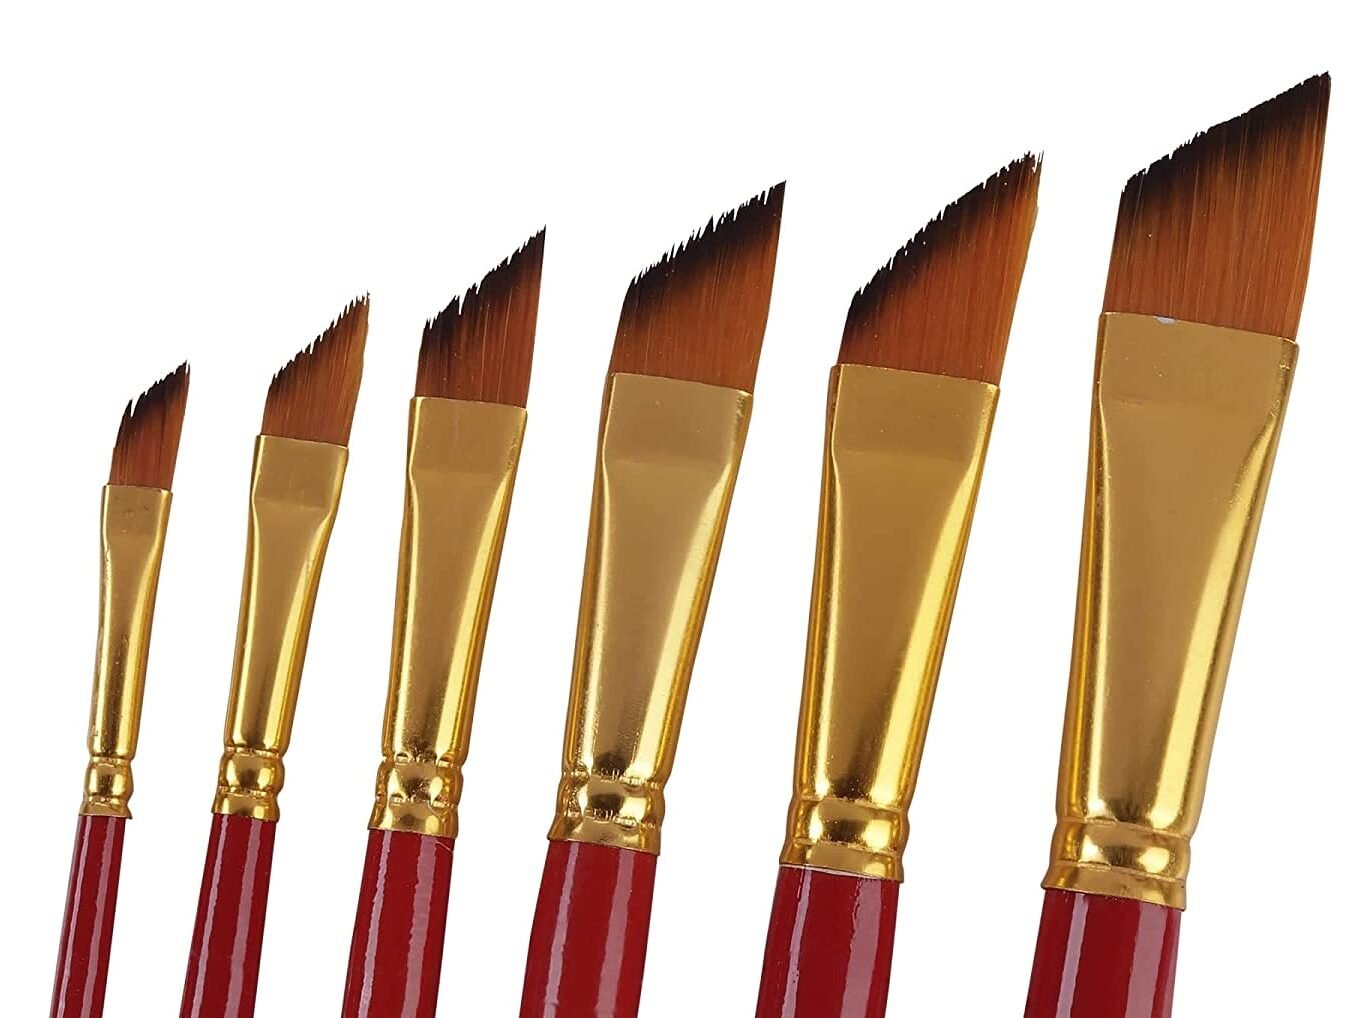
3. Rigger Brush
Rigger brushes are a kind of round brush, contrary to popular misconception among many unskilled artists. This very tiny and sharp point of the brush makes it easy to misdirect. Very few of the bristles on these brushes are on the longer end of the length spectrum.
The best way to utilise them is to make long, continuous strokes because despite having few bristles, they can carry a lot of flowing paint. This is useful for a wide range of tasks, including lettering, highlighting, creating calligraphic marks. Also it helps creating other delicate features like waves, leaves, tendrils, and more.
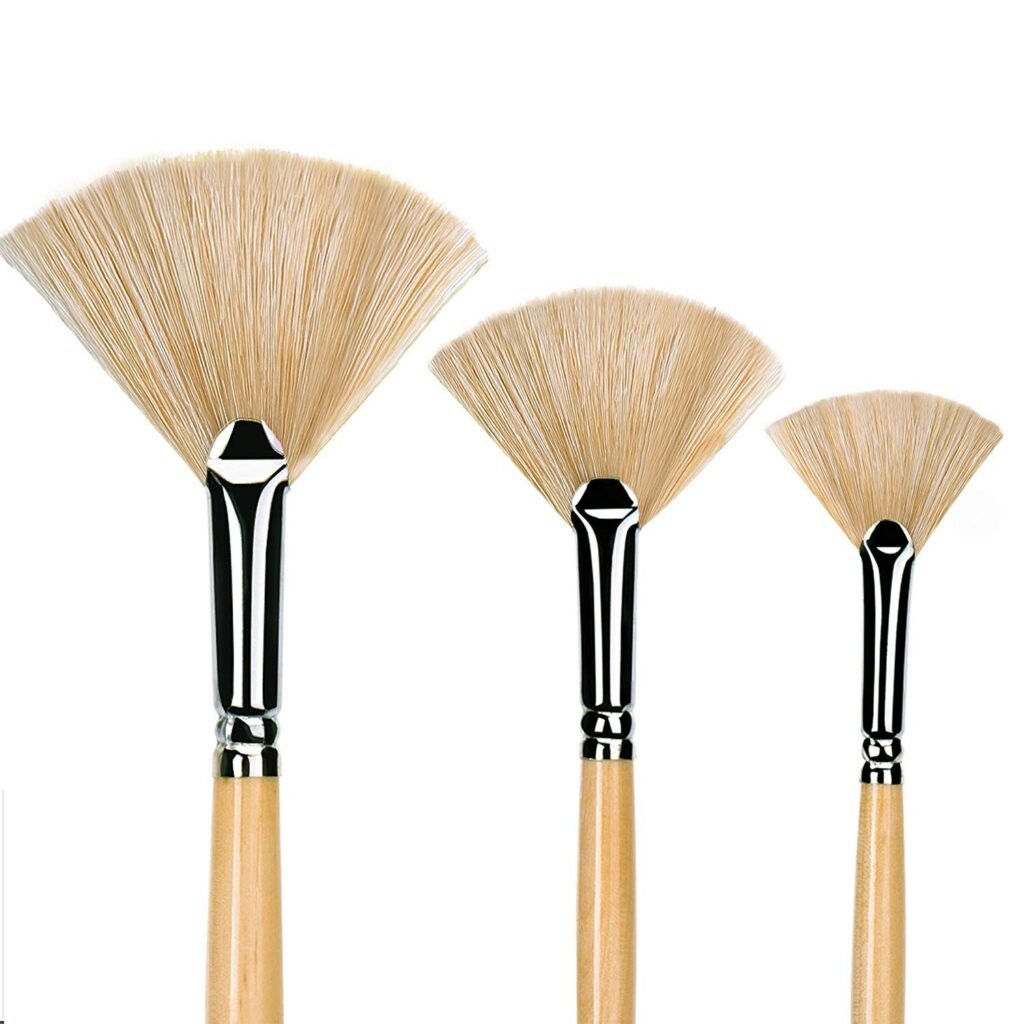
4. Fan Brush
This brush has a fan-like shape, as the name would imply. It has a narrow base with a large, splayed-out bristle area that is thin and does not have a lot of hair strands in it. These brushes have edges that stick out from the brush’s body.People typically create smooth textured wigs or extensions by using natural hair strands.
Rarely are fan brushes used in the painting portions of any artwork for their intriguing characteristic. You should use these to give texture to paintings of landscapes, rural scenes, etc. or to dust off any extra paint.
5. Bright Brush
In contrast to flat brushes, bright brushes are a sort of flat brush that have short bristles. The bristle is thin and always appears to be generously square in shape. In order to paint with the brush in precise, brief strokes, its bristles are normally stiff.
It is important to always keep in mind how stiff these bristles are. When used carelessly, especially in wet-on-wet situations, they can cause the lower coat of paint to peel off along with the upper layer. I can use this brush to paint large, open spaces more quickly.
6. Angled Brush
Angled brushes are effective for painting round edges as they allow for quick coverage of larger areas. Without a doubt, angled brushes will give you a crisp edge on any painting without even a whiff of shoddiness to diminish the picture.
A set of angled brushes is another must for all artists. These bristles are flat with an inclined or slanted edge, featuring longer bristles on one side than the other. These are available in a variety of sizes, from little, angled points to larger ones, in any store.
7. Round Brush
These brushes are normally brought to young kids’ arts lesson and introduced to everyone at a very young age. They are usually obliged to bring them. Round brushes, as you might have guessed, have round tips with both blunt and sharp edges.
The bristles on the sharp brushes are fewer than those on the blunt ones, giving the latter a more pointed edge. While the thinner ones are better suite for fine details, the thicker ones can be utilise to fill in larger areas. Depending on the pressure you apply while using them, these are a flexible tool that may be used for a variety of painting methods.

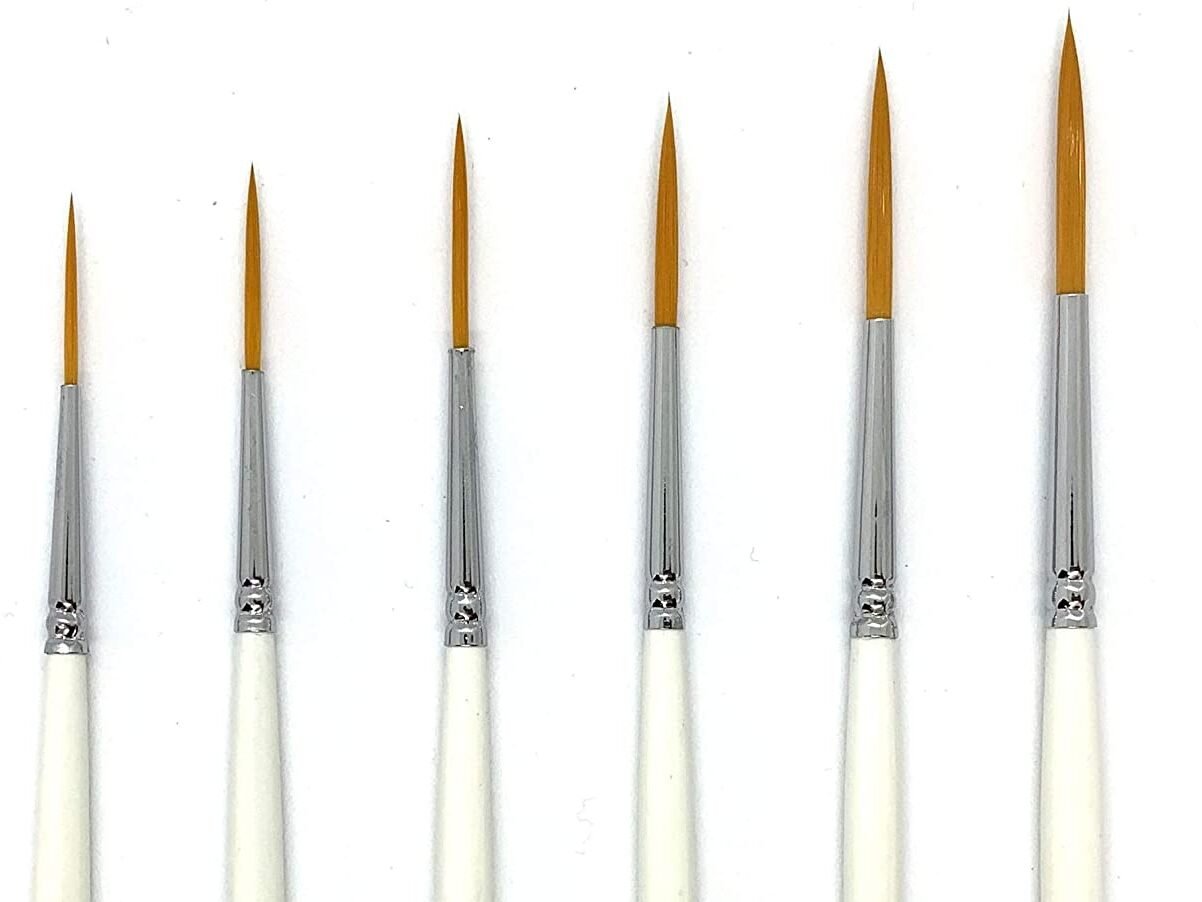
8. Liner Brush
Although it is quite simple to think that brushes cannot get any thinner than round brushes, liner brushes offer evidence to the contrary. These are very thin brushes with long, flat or square-shaped bristles. A sword brush is what you get if you choose an angled liner brush.
A liner brush tip’s small size is ideal for numerous detailing tasks in addition to others, such as writing letters, etc. Painters use these brushes usually to sign their paintings. They function best when dipped in a liquid with an inky consistency.
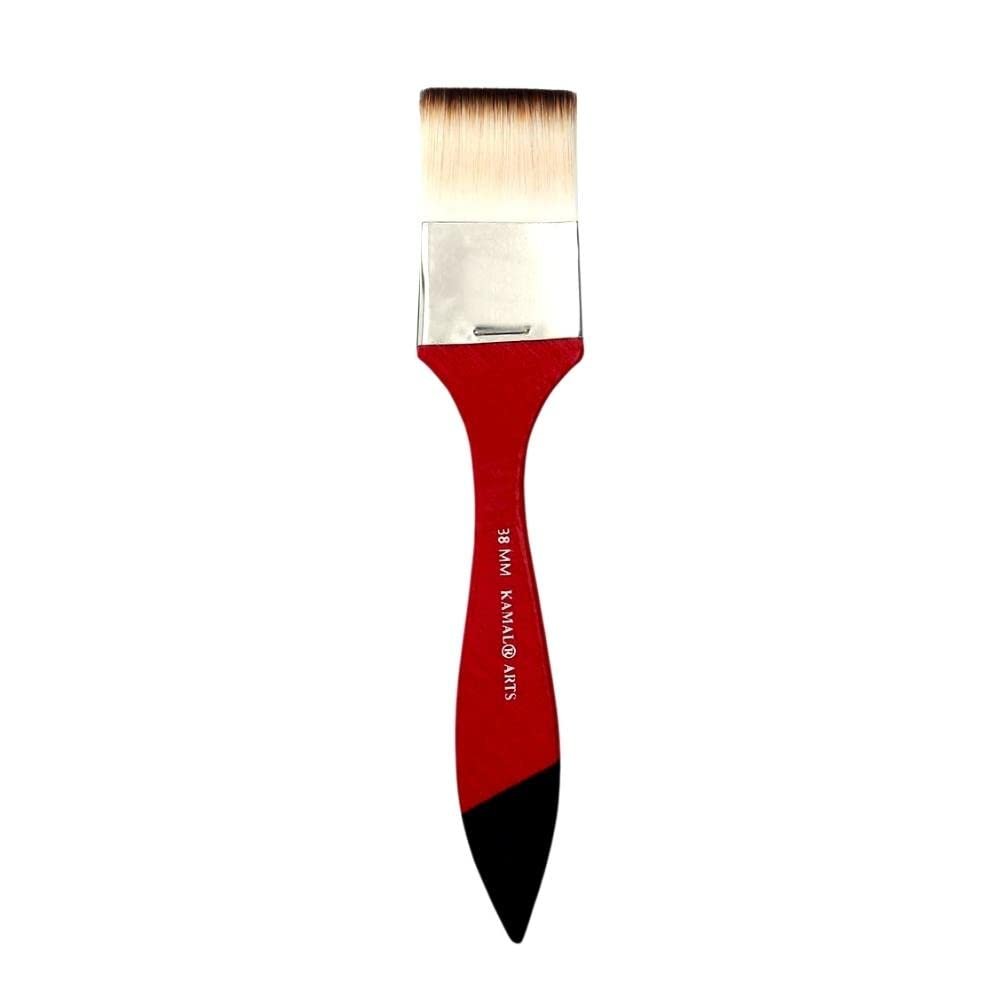
9. Wash Brush
An artist’s toolkit typically includes this additional type of brush, particularly if the artist specialises in painting landscapes, rural scenes, or urban scenes. A wash brush’s medium-length bristles and exceptional width and flatness make it the perfect tool for quickly and efficiently covering a vast area.
These brushes are also available in a variety of widths. Starting with the widest being an acrylic wash brush perfect for varnishing with strong strokes. Although these are only used for applying washes, their width also makes them helpful for other tasks that might or might not be connected to the arts.
10. Filbert Brush
Filbert brushes are the last type of paint brush on this list. This brush has flat bristles that culminate in a round or oval edge, akin to an eye shadow brush in makeup. These come in a variety of shapes to suit your needs, much like other sorts of brushes.
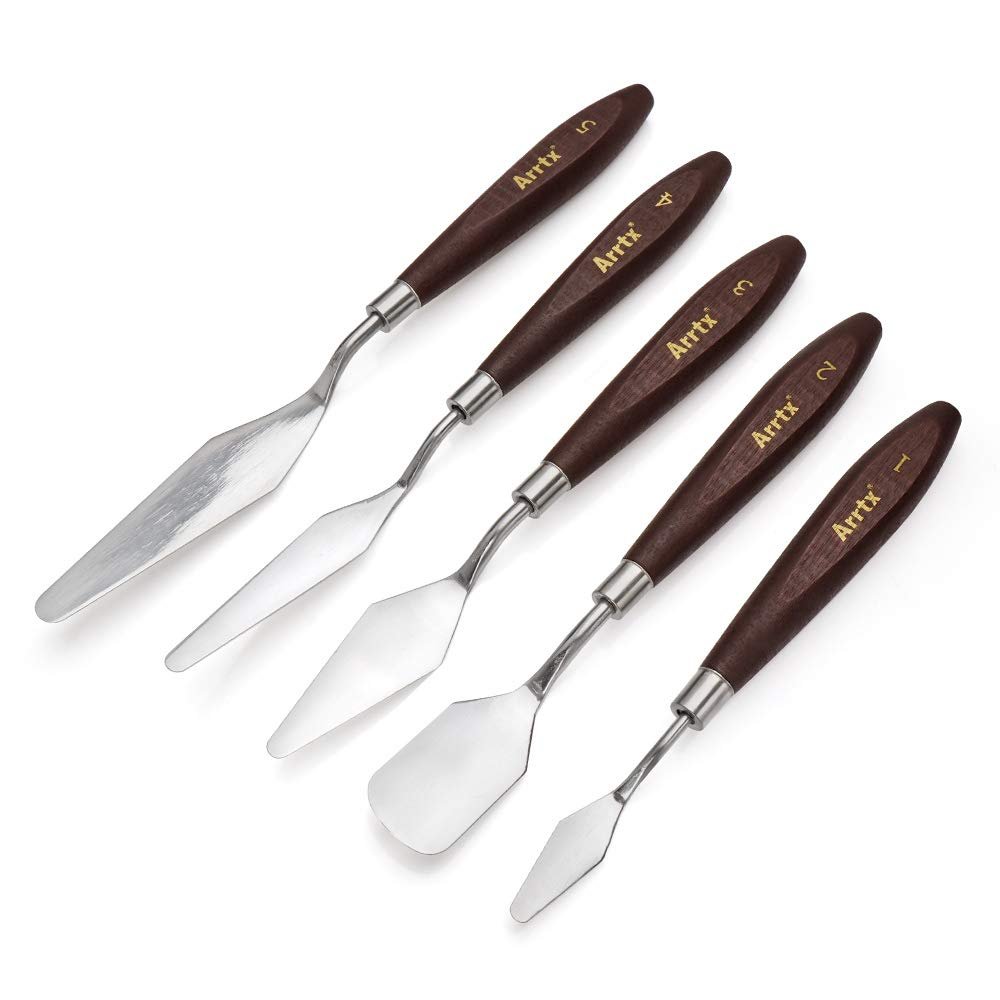
Palette Knives
Artist use pallete knife as a blunt tool. It has a long and straight blade. Primarily used for mixing paints and scraping a palette clean when a painting session is over. It is not the type of palette knife used to apply paint to canvas because of its straight blade and handle.
Most palette knives are metal blades with a wooden handle; however, some are made from plastic.
A palette knife is something that every artist needs, even if they never intend to do a painting using one. You will at the very least need one for mixing paint colors on your palette.
A palette knife is not be confused with a painting knife, although many artists use the term “palette knife” when referring to both types of knives, which is perfectly acceptable.

Painting Knives
The painting knife serves a different function than a palette knife and comes in various styles and sizes. It is also shaped differently than a palette knife. The most commonly used painting knife has a diamond-shaped head and a crooked handle. It is primarily used to apply pigment to canvas. The bend in the handle is so you can hold the knife head flat against your canvas without touching the wet surface with your fingers or knuckles.
A painting knife may be used with any paint — acrylic, water-colors, and oils. However, oil paint lends itself the best to this style of painting because of its thicker consistency. Some artists do entire paintings using a knife instead of a brush. Painting with a knife is a bit like putting butter on bread. Therefore, a great way of creating texture on your canvas. The paint on these canvases is applied so thickly that the strokes, scrapes, and streaks made by the painting knife are clearly visible. This type of painting usually requires advanced skills.
Paints
This one goes without saying, right?
You can paint with acrylic paint, watercolors, oil paints, gouache, etc.
I mostly use acrylic paint. If you’re just starting out, you don’t need to spend a lot of money on professional paints. Buy student grade paints now, practice and develop your skills, and then invest in something more expensive and of greater quality. This way, you’ll feel more confident when you start using more artist-grade paints.
And even more, when starting with cheaper art tools and materials, you don’t feel the pressure of making everything perfect. One can lose the fear of ruining expensive supplies.
To know more about paints, read Acrylic painting vs Oil painting : Which is better?
Final tips about art tools and materials
There are many tools out there, that you can try and experiment with. The ones listed above are some basic ones that will kick-start your knowledge about art tools and their significance.
You can always upgrade, but take it slow at the beginning, and don’t overwhelm yourself with a bunch of supplies that’ll just collect dust. You can take help of this infographic which provides 7 Basic art supplies to start your painting as a beginner.
Finally, choose the ones that really work for you, that you feel comfortable using now, or the ones that you’re the most curious about.